Draw a line
- Hits: 10394
User Rating: 5 / 5

There are several ways to run the line drawing command. As well as several ways to start the line and finish it.
Principle
- Start the command.
- Select starting point.
- End point selection.
Starting the command "Line"
- The first method is to click on the line icon
 (may look different depending on the interface).
 - The second is to use the L shortcut - recommended.
- The third is to repeat the previous command if it was a "line" by pressing the key ß or e.
Select starting point
- Option in which "dynamic input" ≠ is disabled.
Enter two numbers separated by a comma "10.10". These are the horizontal coordinates "X" and the vertical "Y". Confirm the entered values with e.

- Option in which "dynamic input" ≠ is on.
Enter a number for the horizontal coordinate "X". With the button t go to the next field. Enter a number for the vertical coordinate "Y". Confirm the entered values with e.

- Option in which "Object snap" £ is on.
A green symbol appears when approaching an attachment point. If you left-click , the beginning of the line will be where the green marker appeared. Although the cursor is not on the point.

- If you hover the cursor over the green symbol, it is marked with a small green plus. You can then move the cursor until a dotted line is displayed. And enter a value, for example "20". This will start the line 20 from the specified point in the direction of the dotted line and the cursor. Confirm the entered values with e.

Избор на крайна точка
- Option where "dynamic input" ≠ is off.
Enter two numbers separated by a comma "10,20". These are absolute coordinates on the horizontal "X" and vertical "Y". Confirm the entered values with e.

- You can enter coordinates using the last point used to start the coordinate system.
The entered coordinates must start with "@".
You enter "@ 10,-10" which will not make the end of the line of absolute coordinates "10,-10", but of coordinates "20,10", because the previous point was with coordinates "10,20".

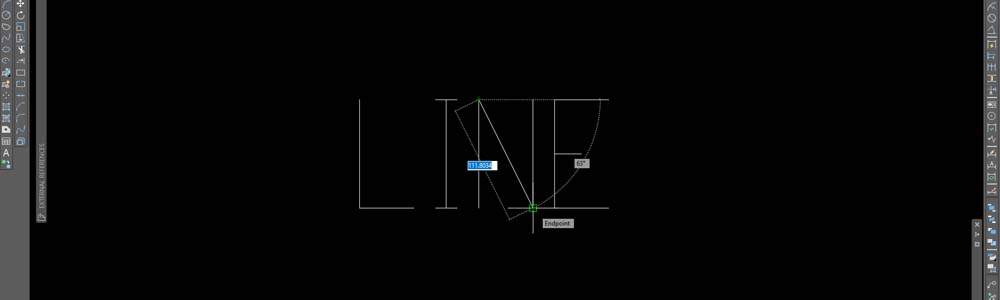
- Option where "dynamic input" ≠ is on.
Enter a number for the length of the line. Press the t button to move to the next field. Въвежда се ъгъла. Confirm the entered values with e.
If you enter a value only in an angle field such as "45", the length remains free. Even when moving the cursor, the line will always be fixed at 45 °, but you will be able to freely change the length. Then use the left mouse button to end the command.

With each command, AutoCAD tells you what to do.
In the case of drawing a line after running the "Line" command, "LINE Specify first point:" will be displayed on the command line. Which means that AutoCAD expects you to set a starting point for a line using one of the methods listed above.

It will then prompt you to select the next point or something enclosed in square brackets "[ ]". What is enclosed in square brackets are more commands you can use. In this case, the [Undo] command appears. Again, use one of the methods listed above to select a second point.

After making at least two lines, another [Close] option will appear.

How to use these options?
Note that some of the letters are colored in a different color. In my case, they are blue [Close Undo]. To use one of the commands, you must enter the colored letter of the corresponding command on the keyboard.
If you want to use the "Undo" command to go back one step you must enter U and after this ß. Keep in mind that if you want to go back one step right away, you have to type again U and after this ß. If you press again ß without pressing U you will terminate the command.
The "Close" command will draw a line from the last point you selected to the very first point you started. In the example above, this will make a line from point 5 to point 1 and terminate the command "Line".
 Български
Terms & Conditions
Subscribe
Report
My comments